Ever wondered how to replace a cylinder head without breaking a sweat? This essential engine component plays a critical role in your vehicle’s performance, and tackling its replacement might seem daunting. With the right tools and a clear guide, you can save money and ensure your engine runs smoothly—keep reading to learn how.
Tools And Materials Needed

Replacing a cylinder head requires careful preparation and the right set of tools and materials. Gathering these beforehand ensures a smoother and more efficient process.
Essential Tools
A set of essential tools guarantees proper disassembly and reassembly.
- Socket set: Includes various sizes to remove head bolts and other fasteners.
- Torque wrench: Ensures bolts are tightened to the correct specifications.
- Breaker bar: Helps loosen stubborn bolts during disassembly.
- Screwdrivers: Both Phillips and flathead types for versatile use.
- Allen wrenches: Often required for specialized bolts.
- Pry bar: Assists in removing the cylinder head without damaging other components.
- Feeler gauge: Used for checking valve clearances.
- Rubber mallet: Prevents damage when tapping components.
Recommended Materials
Using high-quality materials improves the durability and performance of the repair.
- Replacement cylinder head: Must match your vehicle’s make, model, and engine specifications.
- Head gasket: Always replace the gasket when installing a new or reconditioned head.
- Sealant: Designed to ensure a proper seal for gaskets and mating surfaces.
- Coolant: Replenishes the system after the repair.
- Engine oil: Necessary for an oil change after assembly.
- Cleaning solvent: Removes old gasket residue and debris from the surfaces.
- Rags: Keeps tools and engine parts clean during the process.
Assembling these tools and materials beforehand simplifies the task and prevents delays.
Preparing For The Replacement

Handling a cylinder head replacement requires thorough preparation to ensure success. Focus on safety, gather the necessary information, and understand the process before starting.
Safety Precautions
Protecting yourself is crucial when working on engine repairs. Wear safety goggles and gloves to avoid injuries from debris or chemicals. Work in a well-ventilated area to reduce exposure to harmful fumes. Turn off the engine and disconnect the battery to prevent electrical hazards.
Use equipment like jack stands if lifting the vehicle is necessary. Check that tools are in good condition to avoid damaging components or injuring yourself. Keep a fire extinguisher nearby when working around flammable substances.
Gathering Information And Manuals
Familiarizing yourself with the correct procedures is essential. Obtain the vehicle’s service manual to reference exact torque settings, bolt sequences, and other technical details. Use online repair guides or video tutorials for additional clarity.
Identify the engine model and cylinder head type to ensure compatibility with the replacement parts. Check the manual for troubleshooting tips about related components like the camshaft or valves. Keeping accurate documentation reduces mistakes during the replacement process.
Removing The Old Cylinder Head
Properly removing the old cylinder head ensures the replacement process goes smoothly. Follow the steps below to prepare the engine.
Draining Fluids
Start by draining the engine oil and coolant to avoid contamination. Use a drain pan to collect the fluids and prevent spills. Open the radiator drain valve and let the coolant flow out. Remove the oil drain plug to empty the engine oil, ensuring no residue remains in the system. Dispose of the used fluids according to local regulations.
Disconnecting Components
Once the fluids are drained, disconnect all components attached to the cylinder head. Unplug the battery terminals to eliminate electrical hazards. Remove the intake and exhaust manifolds by unbolting their fasteners. Label wiring harness connections and carefully disconnect them to ensure proper reinstallation. Detach fuel lines using a wrench, and make sure to plug the ends to prevent debris entry. Take off the spark plug wires and ignition coils to access the cylinder head bolts.
Detaching The Cylinder Head
After disconnecting components, locate and remove the cylinder head bolts. Follow the sequence provided in the service manual to avoid deforming the head or block. Use a breaker bar if the bolts are tight. Once all fasteners are removed, gently lift the cylinder head from the engine. Use a pry bar if it’s stuck, but apply even pressure to avoid damage. Clean any debris or remaining gasket material from the engine block using a cleaning solvent and rags before proceeding with installation.
Installing The New Cylinder Head

Proper installation of the new cylinder head ensures your engine operates reliably. Follow these steps carefully to reduce errors and improve efficiency.
Cleaning The Mounting Surface
Thoroughly clean the engine block’s mounting surface to ensure a proper seal. Use a cleaning solvent and a clean rag to remove dirt, old gasket material, and debris. Inspect the surface for cracks or uneven areas as these can affect the gasket’s seal. Repeat the cleaning process if residue remains after the first attempt.
Check that no foreign objects or contaminants are left on the surface before proceeding. Even minor debris can cause leaks or improper compression between the head and engine block. Taking extra time during this step prevents future complications.
Placing The New Head
Position the new cylinder head on the engine block with precision. Align the head with the dowel pins to ensure it’s seated correctly. Handle the new head carefully to avoid damaging the gasket or sealing surfaces during placement.
Ensure the new head gasket is installed between the head and the engine block according to the manufacturer’s guidelines. Use the service manual to confirm the gasket type and alignment for your vehicle. Misaligned gaskets can lead to leaks or overheating, so double-check alignment before securing the head.
Tightening Bolts Correctly
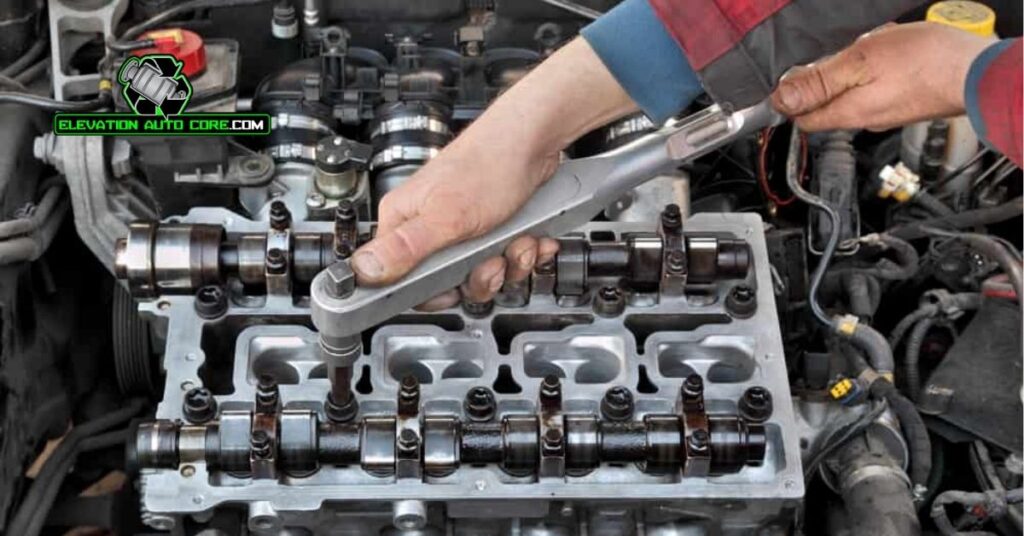
Secure the cylinder head with bolts following the correct torque sequence and specifications. Refer to the service manual for the precise bolt-tightening pattern and torque values for your vehicle model. Start tightening from the center of the head and move outward in gradual increments to distribute pressure evenly.
Use a torque wrench to tighten bolts to the specified torque level. Avoid over-tightening as it can strip threads or damage the engine block. Once all bolts are tightened, recheck the torque for accuracy. This step ensures a solid seal and optimal engine performance.
Post-Installation Checks

After securing the new cylinder head in place, performing checks ensures proper functionality and longevity of your engine. These assessments help identify potential issues early, avoiding costly repairs.
Inspecting For Leaks
Begin by examining all connections for leaks, especially around the head gasket, coolant lines, and oil seals. Look for visible signs of coolant or engine oil escaping, such as damp surfaces or puddles. Tighten any loose connections immediately and verify that seals and gaskets are correctly aligned. Pay particular attention to the areas where the head meets the block, as improper seating can lead to leaks affecting engine performance.
Visually inspect the cooling system and radiator hoses under pressure to confirm they remain secure. Ensure that the engine oil level and coolant level are within the proper ranges before proceeding further. Repeat this check once the engine has been run briefly, as temperature changes can affect seal tightness.
Testing Engine Performance
Start the engine and let it idle to monitor its behavior. Listen for irregular noises, such as knocking, knocking, or whistling sounds, which may indicate improper installation or misaligned components. Gradually increase engine speed and check for smooth acceleration without hesitation or misfire. Verify that the exhaust is free from unusual smoke, as white or blue smoke could signify persistent leaks.
Use a diagnostic tool to confirm all sensors are functioning correctly. Ensure the engine operates within normal temperature and pressure ranges by monitoring the instrument panel or an external gauge. If the check engine light appears, scan for error codes to address any issues promptly.
Conclusion
Replacing a cylinder head might seem challenging at first, but with the right tools, preparation, and attention to detail, you can handle it confidently. Taking the time to follow each step carefully ensures your engine runs smoothly and efficiently.
By staying organized and prioritizing safety, you’ll not only save money but also extend the life of your vehicle. A properly installed cylinder head can make a important difference in your car’s performance, giving you peace of mind on the road.

